Monday, April 27, 2015

Hand Spun Embroidery Floss Part I


Last year at the Maryland sheep and wool festival I picked up a pound of some beautiful Shetland combed top wool. I have processed some raw fleece but I wanted a really nice wool that I could use to make embroidery floss with. I thought Shetland would be especially good for this as the fiber has a long staple length and with a good wool you can spin it really fine.
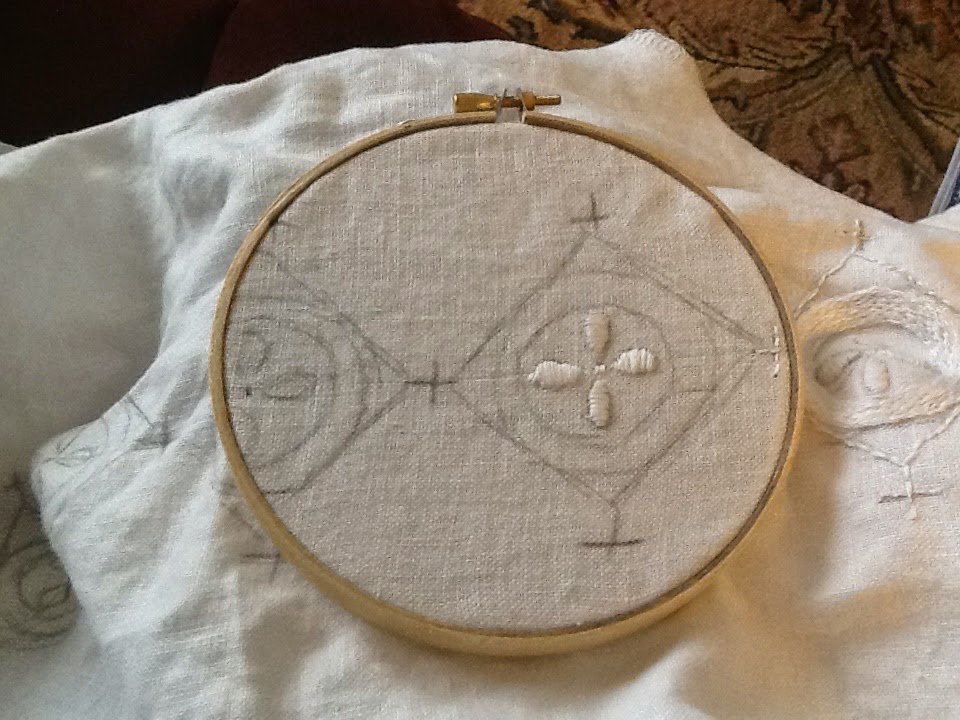
I have decided that I would indeed make hoods from the Black Welsh Mountain sheep hand woven fabric I had left over from my Fleece to Flock project that had to be re worked. I will go ahead and finish the fabric as I had intended to for the dress. I am going to make an open front hood for myself and hood for my husband that is decorated with embroidery. The embroidery will be done from my own handspun.
I want to try doing a gradient dying on the skeins. I have a kit with all natural dyes. The plan is to mordant all the skeins at once and then make a strong dye bath of a color. Dye the first skein in it. Then dye a second, and then a third. If I work it right each of the three skeins should be lighter shade of the same color.
 
 
The original combed top. It came from The Little Barn vendor at the Maryland Sheep and Wool festival
 
the same wool out of the bag.
 
Lots of skeins!! I mad small 10 yard skeins to use as samples for the Arts and Science display and the larger 25 yard skeins will be what I actually use to embroidery with. I am sure it will last me a long time and be used for many projects.
 
 
I took a really great spinning class taught by Nelda Davis and in the class she told us a great way to scour our yarn after spinning. You fill a pot with warm water, add enough Orvus paste so that the water feels slippery. Add the yarn and heat the water to almost boiling for about 20-40 minutes, gently moving yarn around 2-3 times. turn off the heat then let cool in the pot. Spin the yarn dry and let it hang dry. The yarn comes out really great looking and completely clean. I thought it wise to do this if I intended to dye it to make absolutely sure there was no dirt or grease left in the yarn.


I have a pot dedicated to dying. NEVER, ever dye in pots you prepare food in. Since I have a reserved pot for dying I also use it for scouring yarn. It is a very heavy stainless steel pot.

 
doesn't that look yummy? At least I know it is clean.
 
Check back to find out how they dying comes out!


Sunday, April 26, 2015

Soay Fleece Part I

 
The Soay sheep breed is one of the oldest sheep breeds going back at least 4000 years to the island of Soay off the west coast of Scotland. It is a very rare breed of sheep and I have spent at least 2 years trying to find a fleece to spin. Last year at the NY sheep and wool festival I got to meet 2 fantastic Soay sheep and their shepherds.

 
This handsome fellow is Aragorn. He was so beautiful and friendly!! I was able to pet him and he even let me touch his very impressive horns!!! He was a bottle fed sheep so he is really used to humans touching him. This picture was taken with my old crappy camera and the beautiful color of his fleece does not at all come through in this picture. He lives at Cairn O' Mohr farm and his fantastic shepherds were able to hook me up with 3lbs of fantastic wool from their flock.
It is interesting to note that Soay do not need to be shorn since they shed their wool.
 
 
I was a little nervous when I got the wool in the mail. The fiber is BEAUTIFUL and has hardly any vegetable matter in it, but the locks are so small! I guess I will be carding this wool and not combing it. Still I think it will make something really wonderful.

 
Here is a few ounces after it has been washed. There is a bit of scurf on some of the locks (a type of dandruff some sheep get), but it is not so bad. I have a few more things to finish up before I start spinning this but I can hardly wait. Even though I have 3 lbs of this wool I plan on spinning most of it on a drop spindle. Since it is a very period breed it will be an excellent wool to bring to events and demos where people can watch me spin it.

 
I took a little bit of fiber and spun it right from the clean locks. It was not difficult at all, the wool is really "sticky" so I don't think it will be difficult to spin up even with the tiny lock size. There are a few of the locks next to the spindle so you can see how small they are. It is all part of the fun of working with different breeds of sheep.
 
I will put aside some unspun locks, 25 yards of spun yarn, and a small woven sample for the arts and science project. I plan to use some to weave up some Viking leg wraps for my son, and I will decide what else to make based on how much yarn I am able to spin from this 3 lb bag. If I spin it all on the drop spindle I will have a long time to decide :)
 

Saturday, April 25, 2015

Tudor Smock Part II


Progress!! I have not been able to start the embroidery yet, but I have the silk thread, the linen to work on and most importantly I have finally decided on the design(s).
I had a really good discussion with Mistress Amy at East Kingdom 12th Night and she helped me make sense of all the research I had collected. I was surprised to learn that not all black work was done in back stitch! She also encouraged me to come up with my own designs, instead of just trying to replicate what was in the Holbein painting.

 
I know that this has been done a million times before, but I LOVE this painting and this dress. I am going to completely different fabric for the dress than what is in this painting, but I really love the embroidery on the cuffs and I wasn't sure I could do something this elaborate. After thinking on this a lot I decided on a compromise. I will use the same embroidery design on the ruffled cuff, and my own design on the band that goes around the bottom of the sleeve where it connects to the cuff. For the neckline I am using another design based on a different extant piece.

 
I found this redacted black work pattern by Lorraine Behrens. I will use this and do it in double running stitch (or try to at least!)
 
 
From Patterns of Fashion 4 . It shows embroidery on the ruffled cuff and along the bottom of the sleeve.

 
I designed a thistle design to be used along the bottom of the sleeve. Since the back of this will not be seen I plan to do this in back stitch.
 
 
Also from Patterns of Fashion 4. The picture in the upper left corner reminded me of crossed crosslets. In Acre embellishing your clothes with a crossed crosslet is reserved for knights but since it is not a full crossed crosslet I thought it would be OK if I used this design on my smock.


My version of the pattern above. I plan to do this in back stitch around the neckline of the smock.

 
This is from The Tudor Tailor and is the pattern I will be using to make my smock.
 
Now that I have a plan and the materials, I just need to get started on the embroidery!! Stay tuned for more.


Friday, April 24, 2015

Byzantine under tunic


In the Kingdom of Acre, when a Sovereign is going to be crowned Queen (or King) they enter the church in a plain white shift with their hair loose and the during the ceremony the church officials dress them in ceremonial clothes. This plain white under tunic is sometimes embellished with white work embroidery. It was my pleasure to do this work on the tunic for our current Queen Persephene for her coronation.

She has a Byzantine persona so before I did any stitching I did some research to find out what were some common Byzantine motifs. I also wanted to incorporate her heraldry if I could. I came up with the following design.


The Hippocampus is part of her heraldry. The rest was based on designs I saw repeated over and over in Byzantine mosaics.


Here is the design sketched out on the tunic and the hoop ready to go on the first motif. I used white DMC floss on heavy weight linen fabric. Silk would have been nicer but I wanted her to be able to wash it with no worries. I marked the linen with a regular #2 pencil which easily came out in the wash after it was done. (always test a swatch first!)

 
The petals on the flower like design were done in satin stitch.

 
The outline and crosses on the motif were done in back stitch
 
 
The circles were done in split stitch. If I had it to do again I would use a tear away interfacing while stitching to keep the fabric at even tension. I had planned to do it originally and even bought the interfacing but thought I would be good enough without it. It turns out with this much embroidery in a circle really warped the fabric in the center of the circle no matter how carefully I stitched it.


This is clearly not a good picture. I have since gotten a better camera and hope to get a better picture in the future. The total project took around 40 hours to complete. It was by far the biggest embroidery project I have undertaken. Some people think that is too much work to put in for an under tunic, but I wanted to give Persephene a piece of garb that she could treasure to remind her of her coronation day.
 

Thursday, April 23, 2015

Byzantine Cowls


I have been away from the blog for too long. In an effort to catch up, here are some close up pictures of the beading I did for the Byzantine Garb that Rose and I made for the Coronation of Persephene and Dionisis. Each collar took about a week of 6-hour days to bead it. The second went faster than the first because I learned from the mistakes of the first. Like do the beaded fringe last so your thread does not get tangled in it when you bead the rest of it.


Top view of collar for Persephene. She is the Sovereign Queen so she gets to wear the purple.
 
 
 Close up picture

 
Collar for his Grace King Dionysis. Since he is the consort he got less pearls.

 
This took way longer than I thought it would. I watched 2 Ken Burns documentaries and all seasons of Portlandia !!!!


Sunday, November 30, 2014

Tudor Embroiderd Smock

As if I didn't have enough garb in the que, I have accepted and embroidery challenge!

 I should back up and say that I LOVE the history and garb of the Tudor time period, but as much as I love the garb it is really too much for me to wear and be productive. Also it is out of MSR's timeline. However I always wanted to make 1 really awesome Tudor dress. I mentioned this to Rose and she happened to have the perfect fabric (of course) in stock at Roses' fabric emporium and it is even in purple. But the project has been sitting on the shelf for over a year. I have this MAJOR sewing project going on right now (Byzantine garb for Acre coronation) and I thought maybe after that.....

Then Athena's thimble had some of there masters issue challenges, and I LOVE challenges. So I accepted one from Mistress Amy Webbe. Her challenge is create a 16th century embroidered clothing item or accessory. Well that was the kick I needed to get started. I was really hung up on making the smock as I wanted to make that first and that was the item I knew the least about.

I have contacted Amy and officially accepted the challenge and spent the last 2 hours doing internet research and getting lists of library books to go look at.

I realized when I was talking with someone I very much respected about doing A&S competitions that the thing I am most nervous about is that my research won't be enough. It is the problem I had in college when I was doing research papers. I never thought I was done with the research part.

So I think I have enough info to make a plan on how to do the smock. I still have to finish the Byzantine stuff I am working on, but I think I have a definite plan and even an blackwork design. I am going to document everything and since I am starting from square one, I might as well prepare it so it can also be an A&S submission. I have about 4 of them in the works, none of them ready for display :)

I already know I want to do my dress based on the design of what Jane Seymour wore. I have the fabric and I have a plan. I just need to take that first step!

Monday, November 3, 2014

Checking in on my Olives

Well things are certainly happening. I am not sure exactly what, but things are happening. I have tried in vain to find out the actual chemistry of what is going on with some of these cures, I have the general idea of what is supposed to be happening so I guess that will have to do.

The problem is that I am not sure what they are supposed to look like, so I can't wait to get together with the others who are curing olives and see what is what.


Olives in salt water brine after 2 weeks. This is the one that most concerns me. I totally guessed at how much salt to add to the water so I am not sure if the milky water is good or bad.

Olives in honey at 2 weeks. The olives on the top are more brown than what is underneath. I have been stirring all 3 cures every few days so hopefully they will look uniform. I think the honey is starting to ferment as it certainly smells like meade.


Olives in Vinegar brine at 2 weeks. I have seen the least change in this batch. They are just about as dark as they were last week and no real change to the liquid.


Olives in salt water brine at week 3. Um....ewww. I am not sure what is going on. There is now some white solid matter on the surface that dissipates upon stirring. It smells faintly of yeast so I am hoping it is that and not mold.

Olives in Honey at week 3. Olives getting darker and honey getting thinner and smells a bit more like there is some fermentation of the honey going on.

Olives in Vinegar brine at week 3. This one still looks about the same. Most tempted to taste test one of these :)