Showing posts with label embroidery. Show all posts

Thursday, April 30, 2015

Mudthaw Embroidered Dress

Last year Lydia and I once again worked on garb for the Baron and Baroness of the Settmour Swamp. This time we did 12th century Bliauts. Lydia did the pattern work and most of the sewing and I did the hand sewn button holes and the embroidery around the facing for the Baroness.

 
The neck facing that Lydia measured out for me. This is what I would be embroidering on.

 
Three versions of the design that the Baroness liked. We decided to use the one on the far left.

 
I drew it out on paper first so that I could work out the turns in the pattern and make sure it was even on both sides.

 
I then put the paper pattern on a light box and put the fabric over it so I could trace through to the fabric using a pencil.

 
One thing I have learned is that making a sampler is not an option. You don't want to be trying your embroidery out for the first time on the finished piece. I actually did several different variations and this is the one we liked the best.

 
I started with an outline done in backstitch

 
Then I filled it in using split stitch.

 
The final facing

 
Attached to the dress

 
and from the back. The fabric must have stretched out while I was working on it, because in the end the facing was bigger then the neck of the dress. I tried to work it out when I hand sewed it to the dress, but I still had to put a pleat in the facing. I put it on the back of the dress and hopefully her veil will cover it and no one will be the wiser.

Wednesday, April 29, 2015

White Embroidered Veil

Two years ago for the Settmour Swamp Baronial investiture at Mudthaw I made a silk embroidered white work shirt for our Baron. The design was sinking towers done in couching stitch on the bottom and split stitch on the top half. In between the towers were flowers done with satin stitch, split stitch and back stitch. The Baron loved it and the Baroness really loved it and asked if I would make here a veil with the same embroidery and with beadwork on the edge.
 
I did some searching and could not find any period pictures of veils with white work embroidery and beadwork on them. I love our Baroness very much and since she really wanted this type of veil I decided to go with the creative anachronist theme and do it for her. It took 2 years of working on it, off and on (mostly off) but it finally got done and she wore it 2 years later at this past Mudthaw.
 
This is what the border looks like. Although the handspun silk was really great, it was not nearly as evenly spun as commercially available silk and it made the embroidery look sloppy. Since I needed a lot more of it and I didn't want it to be too heavy on the veil I purchased some Soie d' Alger silk from hedgehog handworks

 
The veil spent a little too much time in the frame and was distorted when done. Hopefully after beading and when it is worn it won't be noticeable. I forgot that you should not leave the hoop on the work if it is going to sit for any length of time.

 
A close up of the embroidery. White on white is so hard to see!


Saturday, April 25, 2015

Tudor Smock Part II


Progress!! I have not been able to start the embroidery yet, but I have the silk thread, the linen to work on and most importantly I have finally decided on the design(s).
I had a really good discussion with Mistress Amy at East Kingdom 12th Night and she helped me make sense of all the research I had collected. I was surprised to learn that not all black work was done in back stitch! She also encouraged me to come up with my own designs, instead of just trying to replicate what was in the Holbein painting.

 
I know that this has been done a million times before, but I LOVE this painting and this dress. I am going to completely different fabric for the dress than what is in this painting, but I really love the embroidery on the cuffs and I wasn't sure I could do something this elaborate. After thinking on this a lot I decided on a compromise. I will use the same embroidery design on the ruffled cuff, and my own design on the band that goes around the bottom of the sleeve where it connects to the cuff. For the neckline I am using another design based on a different extant piece.

 
I found this redacted black work pattern by Lorraine Behrens. I will use this and do it in double running stitch (or try to at least!)
 
 
From Patterns of Fashion 4 . It shows embroidery on the ruffled cuff and along the bottom of the sleeve.

 
I designed a thistle design to be used along the bottom of the sleeve. Since the back of this will not be seen I plan to do this in back stitch.
 
 
Also from Patterns of Fashion 4. The picture in the upper left corner reminded me of crossed crosslets. In Acre embellishing your clothes with a crossed crosslet is reserved for knights but since it is not a full crossed crosslet I thought it would be OK if I used this design on my smock.


My version of the pattern above. I plan to do this in back stitch around the neckline of the smock.

 
This is from The Tudor Tailor and is the pattern I will be using to make my smock.
 
Now that I have a plan and the materials, I just need to get started on the embroidery!! Stay tuned for more.


Friday, April 24, 2015

Byzantine under tunic


In the Kingdom of Acre, when a Sovereign is going to be crowned Queen (or King) they enter the church in a plain white shift with their hair loose and the during the ceremony the church officials dress them in ceremonial clothes. This plain white under tunic is sometimes embellished with white work embroidery. It was my pleasure to do this work on the tunic for our current Queen Persephene for her coronation.

She has a Byzantine persona so before I did any stitching I did some research to find out what were some common Byzantine motifs. I also wanted to incorporate her heraldry if I could. I came up with the following design.


The Hippocampus is part of her heraldry. The rest was based on designs I saw repeated over and over in Byzantine mosaics.


Here is the design sketched out on the tunic and the hoop ready to go on the first motif. I used white DMC floss on heavy weight linen fabric. Silk would have been nicer but I wanted her to be able to wash it with no worries. I marked the linen with a regular #2 pencil which easily came out in the wash after it was done. (always test a swatch first!)

 
The petals on the flower like design were done in satin stitch.

 
The outline and crosses on the motif were done in back stitch
 
 
The circles were done in split stitch. If I had it to do again I would use a tear away interfacing while stitching to keep the fabric at even tension. I had planned to do it originally and even bought the interfacing but thought I would be good enough without it. It turns out with this much embroidery in a circle really warped the fabric in the center of the circle no matter how carefully I stitched it.


This is clearly not a good picture. I have since gotten a better camera and hope to get a better picture in the future. The total project took around 40 hours to complete. It was by far the biggest embroidery project I have undertaken. Some people think that is too much work to put in for an under tunic, but I wanted to give Persephene a piece of garb that she could treasure to remind her of her coronation day.
 

Monday, June 16, 2014

Needle book and pin cushion

This year at the Settmour Swamp's annual Mudthaw event I received a very special gift during baronial court. Baroness Jehannine and Baron Erec brought me and my friend Lydia into court to recognize and thank us for making their garb for them for this year and last years Mudthaw. It was very sweet of them and they also presented us with handmade period sewing needles. I decided that I could no longer put off the needle book project I have been thinking about for a few years.
The embroidery designs are taken out of different cross stitch books that I have and are not documented medieval designs.
I just thought they were pretty, and sometimes that is enough for me :)
 
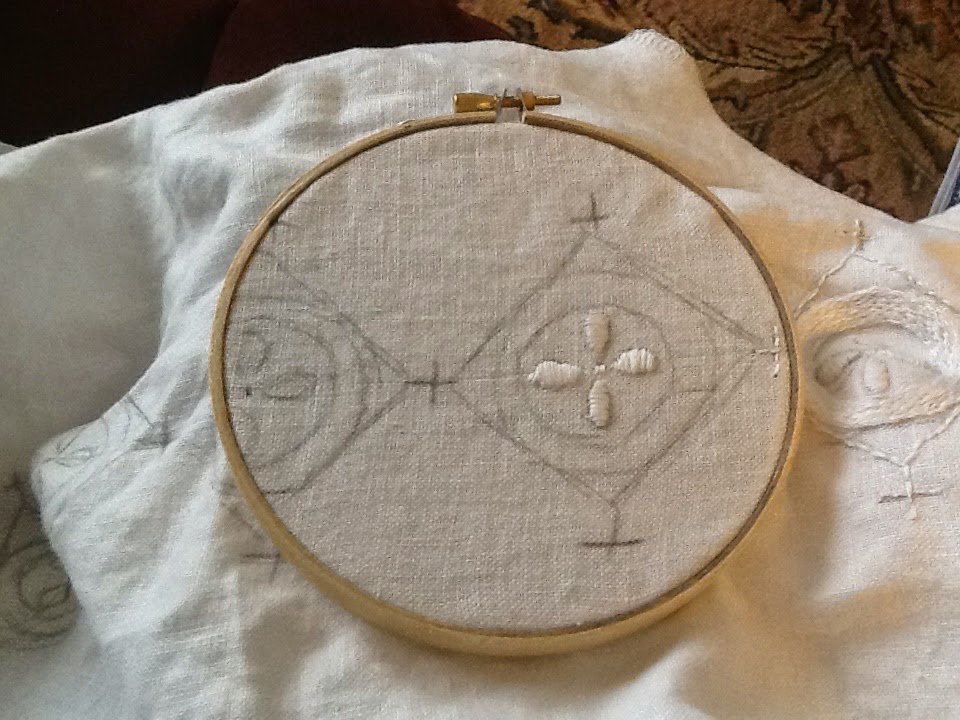
I drew out the border lines for the needle book and pin cushions on aida cloth that I had lying around. I did all the embroidery first before cutting them pieces out so I could use a bigger embroidery hoop when working with the motifs.

Here are the pieces cut out along with the purple fabric I am using for lining. The embroidery floss will be used to connect the pin cushion to the scissors.

The pin cushion with right sides of the fabric together ready to get a seam sewn around the edge.

The needle book with right sides together. The side seams on the purple lining were sewn over before attaching them to the outside cover of the needle book so that It could easily be turned right side out again. Since the side pieces of the cover will be folded over to make inside sleeves in the book it is not necessary to sew the lining seam down.

pinning before sewing.

more pinning

The edges sewn and the corners clipped to make it look better when turned inside out.

I used wool roving and a small knitting needle to stuff the pin cushion.

using a whip stitch to close up the piece I left open for stuffing.

The needle book turned right side out and ironed.

The front view.

Button hole stitch used on edge to keep the edges from fraying and also as a decorative edge.

whip stitching the bottom edge of sleeves.

added "pages" of felt to the book. These pages will be used to hold the needles and pins. I also added green ribbon that will tie the book closed.

Using the purple floss to give it a decorative touch.

I got a tip from an embroider at artisans row at Pennsic to use the plastic from milk containers as thread holders in needle books.

Cutting out using my hard working "misc. craft" scissors. NEVER use your sewing scissors for this type of job.

I made one for the back sleeve and one for the front sleeve.

Used my cropodile tool to punch half circle holes to give a place for the thread to rest.

The finished front of the needle book.

The back of the needle book, with a "V" for Vivian.

inside front cover with thread holder and the 2 needles on the left were the 2 that were gifted to me at Mudthaw.

Center of book with modern store bought needles.

Inside back sleeve with more thread and safety pins.

The final products.